
Download this guide, open it as markdown or explore our other manuals using the buttons above.
Use (Ctrl or CMD) + K to activate fuzzy search.
Why Drop & Render
Drop & Render is a premiere managed render farm solution designed with both freelancers and studios in mind. You send us projects that take hours to render, and we'll have them ready for you in minutes.
- Seamless integration: Our plugin integrates directly into Cinema 4D, Blender and Houdini.
- Managed servers: We bring the hardware, you bring the project. No need to maintain your own infrastructure or set up any virtual environments.
- Plug and play: We take your projects as they are. Drop & Render is built around your projects, not the other way around.
- Outputs where you expect: Downloads go straight to your project folder. Just like rendering locally.
- Dedicated support: You can always reach real people with long term experience in 3D rendering for all of our supported platforms.
System requirements
The Drop & Render Link supports Windows 10 and newer, macOS 12 and newer and 64-bit Linux. All computation happens on our farm, so your workstation only needs to run the Cinema 4D version used by your project.
Setup & installation
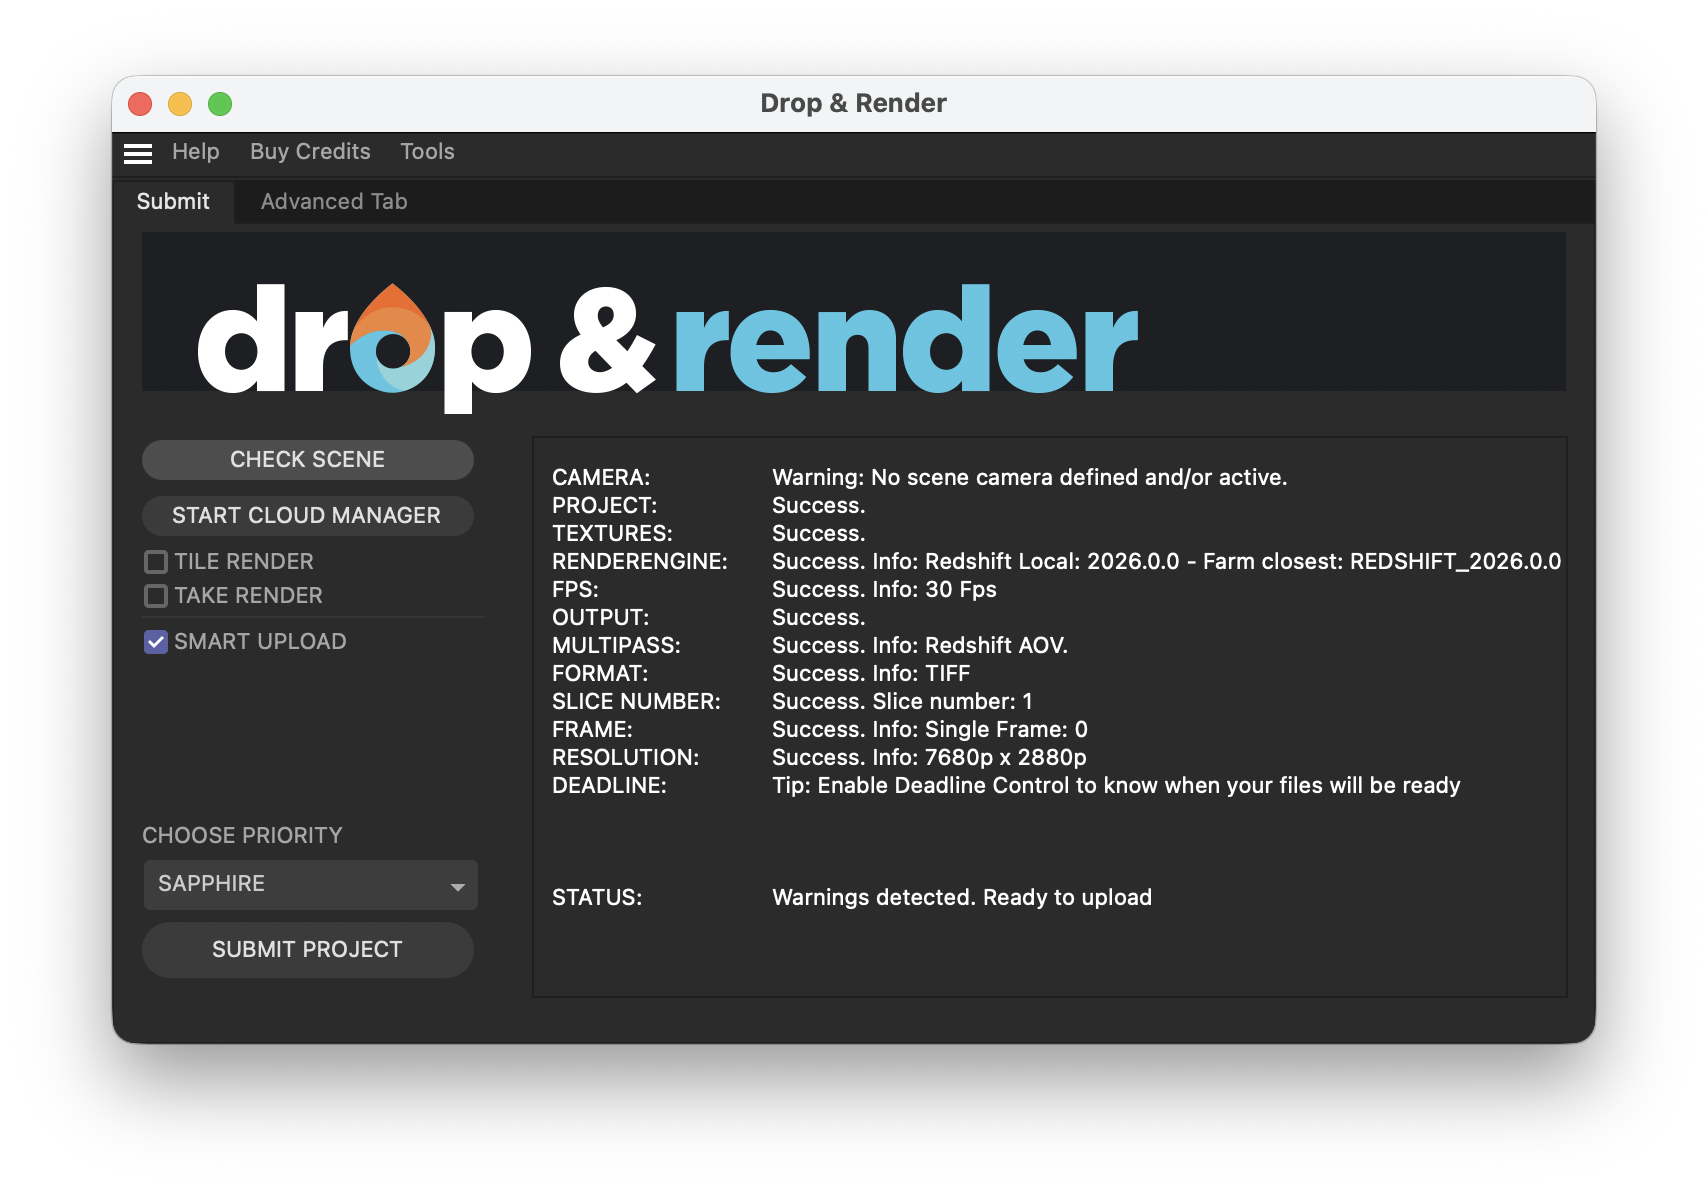
To use Drop & Render, first create an account. Setup opens automatically after registration. Install and open the Drop & Render Link, then choose Cinema 4D from the detected applications to install the plugin. You can return to Dashboard > Plugins later to manage it.
Core concepts
Distribution of work
Our datacenter is filled with top-of-the-line machines optimized for 3D rendering. When you submit a job we will split it many smaller chunk, and give each to an independent machine. This means that your job can be rendered by 50+ machines all at the same time.
Slices & slice numbers
Optimize your render with a Custom Slice Number
Slices are the chunks we split your project into, and the number of frames that are processed by each chunk is its "slice number". Rendering multiple frames in one slice means you reduce the number of times Cinema 4D has to initialize the project. The slice number defaults to 1, but this is not always optimal.
Each job has a startup overhead of 1-2 minutes due to Cinema 4D itself. For a render that takes 30 seconds per frame on our machines, this effectively means that with a slice number of 1, each machine will charge you for up to 2 and a half minutes, even though your render only took up 20% of that time.
Increasing the slice number helps reduce this extra cost - by rendering more frames per slice
you reduce the number of startups. In the above case, if your render has 10 total frames and
you set the slice number to 10, you'll end up doing 5 minutes of rendering for each 2 minutes
of startup. This means your total render time goes from ~25 minutes (2.5 minutes * 10 frames)
to only 7 minutes (~72% faster & cheaper) (2 minutes + 30 seconds * 10 frames) executed
concurrently with 10 machines working at once.
Tip: Aim for approximately 20 minutes of total work per slice (startup + rendering).
Queues and priority
Understanding render priorities
Machines are assigned to slices based on our priority system. We have 3 priority levels, Sapphire (lowest), Emerald (medium) and Diamond (highest). The higher your priority, the further ahead your slices go in the global queue and thus the faster your job will complete.
Each priority level carries a multiplier of cost, with Sapphire standing as the base price. However, the extra costs apply only when the higher priority made a difference. If there are machines immediately available, you will only be charged Sapphire costs even if you choose the Diamond priority.
Tip: For production deadlines, we recommend using the Emerald or Diamond priorities. Use Sapphire when the deadline isn't strict, such as overnight renders or other non-urgent work.
The Drop & Render Link
The Drop & Render Link runs in the background and connects Cinema 4D to the render farm. It keeps the plugin up to date, reuses files already on the farm, uploads new and changed files and automatically delivers completed frames. Monitor and manage jobs from the web dashboard. Once your job is uploaded you can close Cinema 4D, render locally or shut down the workstation; rendering continues on the farm.
Note: Automatic delivery works while the Drop & Render Link is open. If it is closed, delivery resumes the next time you open it.
The sync system
Drop & Render uses an intelligent syncing system with hash-based file comparisons and aggressive de-duplication. When you first upload a file we store a hash of it, which we can then check against any future uploads. If the local and remote hashes match it means the file hasn't changed, so it doesn't need to be re-uploaded. This drastically reduces upload costs when re-rendering alterations of the same project.
Assets uploaded by team members are automatically available for everyone in the studio. They are stored for 7 days after their last usage. We allocate 5TB of storage per studio account by default. More is available on request through our support system.
The download system
Completed frames return to the output folder selected in Cinema 4D while the Drop & Render Link is open. Outputs also remain available for seven days; open the render in the web dashboard to manually download its complete output or selected slices.
The Drop & Render Cinema 4D plugin
Getting started
Opening the plugin
Once installed, you can find the Drop & Render plugin in Cinema 4D under:
Extensions > Drop & Render
This will open the plugin interface where you can configure your render settings and submit jobs to the farm.
Check scene system
Before submitting your project, the plugin automatically runs a scene check to ensure everything is set up correctly. This check verifies:
- Your project file is saved
- Output paths are configured
- All textures and assets are accessible
- Render settings are valid
- Your scene is compatible with our render farm
If any issues are detected, the plugin will show clear warnings with instructions on how to fix them. This prevents failed renders and saves you time and credits.
You can manually run a scene check at any time by clicking the "Check Scene" button in the plugin interface.
Supported render engines
Drop & Render supports all major Cinema 4D render engines:
- Redshift
- Octane
- Arnold
- Corona
- V-Ray
- Cycles 4D
- Physical Renderer
- Standard Renderer
The plugin automatically detects which render engine you're using based on your scene settings.
Plugin & version matching
Drop & Render automatically detects and matches your local plugin versions to ensure renders execute exactly as they would on your machine. This includes:
- Cinema 4D version - Automatically matched to your local installation
- Render engine version - Matched to your installed Redshift, Octane, Arnold, etc.
- Third-party plugins - X-Particles, TurbulenceFD, MeshTools and other supported plugins. View all supported software here
The plugin scans your Cinema 4D installation and uploads version information along with your project. Our farm then activates the exact same versions you're using locally, ensuring consistent results.
Note: If you need to override the automatic version detection, you can manually specify versions in the Advanced tab.
Tile rendering
Render large still frames with Tile Rendering
Tile rendering splits your frame into several rectangular sections. Each tile is rendered on a separate machine, which reduces the memory load per GPU. This makes it possible to handle extremely heavy scenes and very large resolutions without running into VRAM limits.
Tile rendering is ideal for:
- High-resolution stills - Render 4K, 8K or larger images much faster
- Heavy scenes - Distribute memory and processing load across multiple machines
To enable tile rendering:
- Enable Use Tile Rendering in the Drop and Render plugin.
- The plugin automatically selects a suitable tile layout based on your output resolution.
- Submit your job as usual.
- The farm renders each tile in parallel and stitches them back together into one final image, including all render passes.
Tip: If you need to render very heavy animation sequences, you can enable Frame Tiling in the Tools menu. This splits each frame into tiles, making it possible to render full for example 8K sequences that would normally fail on a single workstation.
Take system
Cinema 4D Take Rendering support
Cinema 4D's Take System lets you create multiple render variations of the same scene. Drop & Render fully supports this workflow.
When you enable "Use Take System" in the plugin:
- All enabled takes in your scene are automatically detected
- Each take is rendered as a separate job
- All outputs are saved to the output directory you defined
- All take-specific overrides (camera, render settings, objects) are respected
This lets you render multiple camera angles, lighting setups, or creative variations simultaneously on the farm, dramatically reducing your upload time.
Note: Make sure your takes are properly configured and saved before submitting. The plugin will use the take configuration as it exists when you submit the job.
Advanced tab
The Advanced tab contains additional options for fine-tuning your render job.
Custom slice number
Optimize your render with a Custom Slice Number
Override the automatic slice calculation and manually set how many frames are rendered per slice. See the Slices & slice numbers section for guidance on choosing the right value.
Tip: Start with the automatic settings. Only use custom values if you have specific performance requirements or if advised by our support team.
Custom frame list
Submit a custom frame range to the farm
Override the frame range with a specific list of frames. Use commas and dashes:
1,5,10- Renders only frames 1, 5, and 101-10,20,30-40- Renders frames 1 through 10, frame 20, and frames 30 through 40
This is useful for re-rendering specific frames or creating custom sequences.
Custom Cinema 4D version
Override the automatic version detection and specify exactly which Cinema 4D version to use on the farm.
Only change this if you need a specific version different from your local installation.
Other advanced options
The Advanced tab contains additional settings reserved for troubleshooting and support purposes. These are typically only used when working with our support team to resolve specific issues. If you encounter problems with your renders, our support team may ask you to adjust these settings.