

Your AI assistant, connected to the farm
Prepare, submit and follow Blender, Cinema 4D and Houdini renders from your AI assistant. The MCP extension connects it to the same render farm API included with Drop & Render Link.
Check shot010 on the farm. Tell me how far the render has progressed and whether all its frames are downloaded. Do not change the job.
shot010: 75% rendered, 168/240 frames downloaded. No changes made.
Bring rendering into the conversation
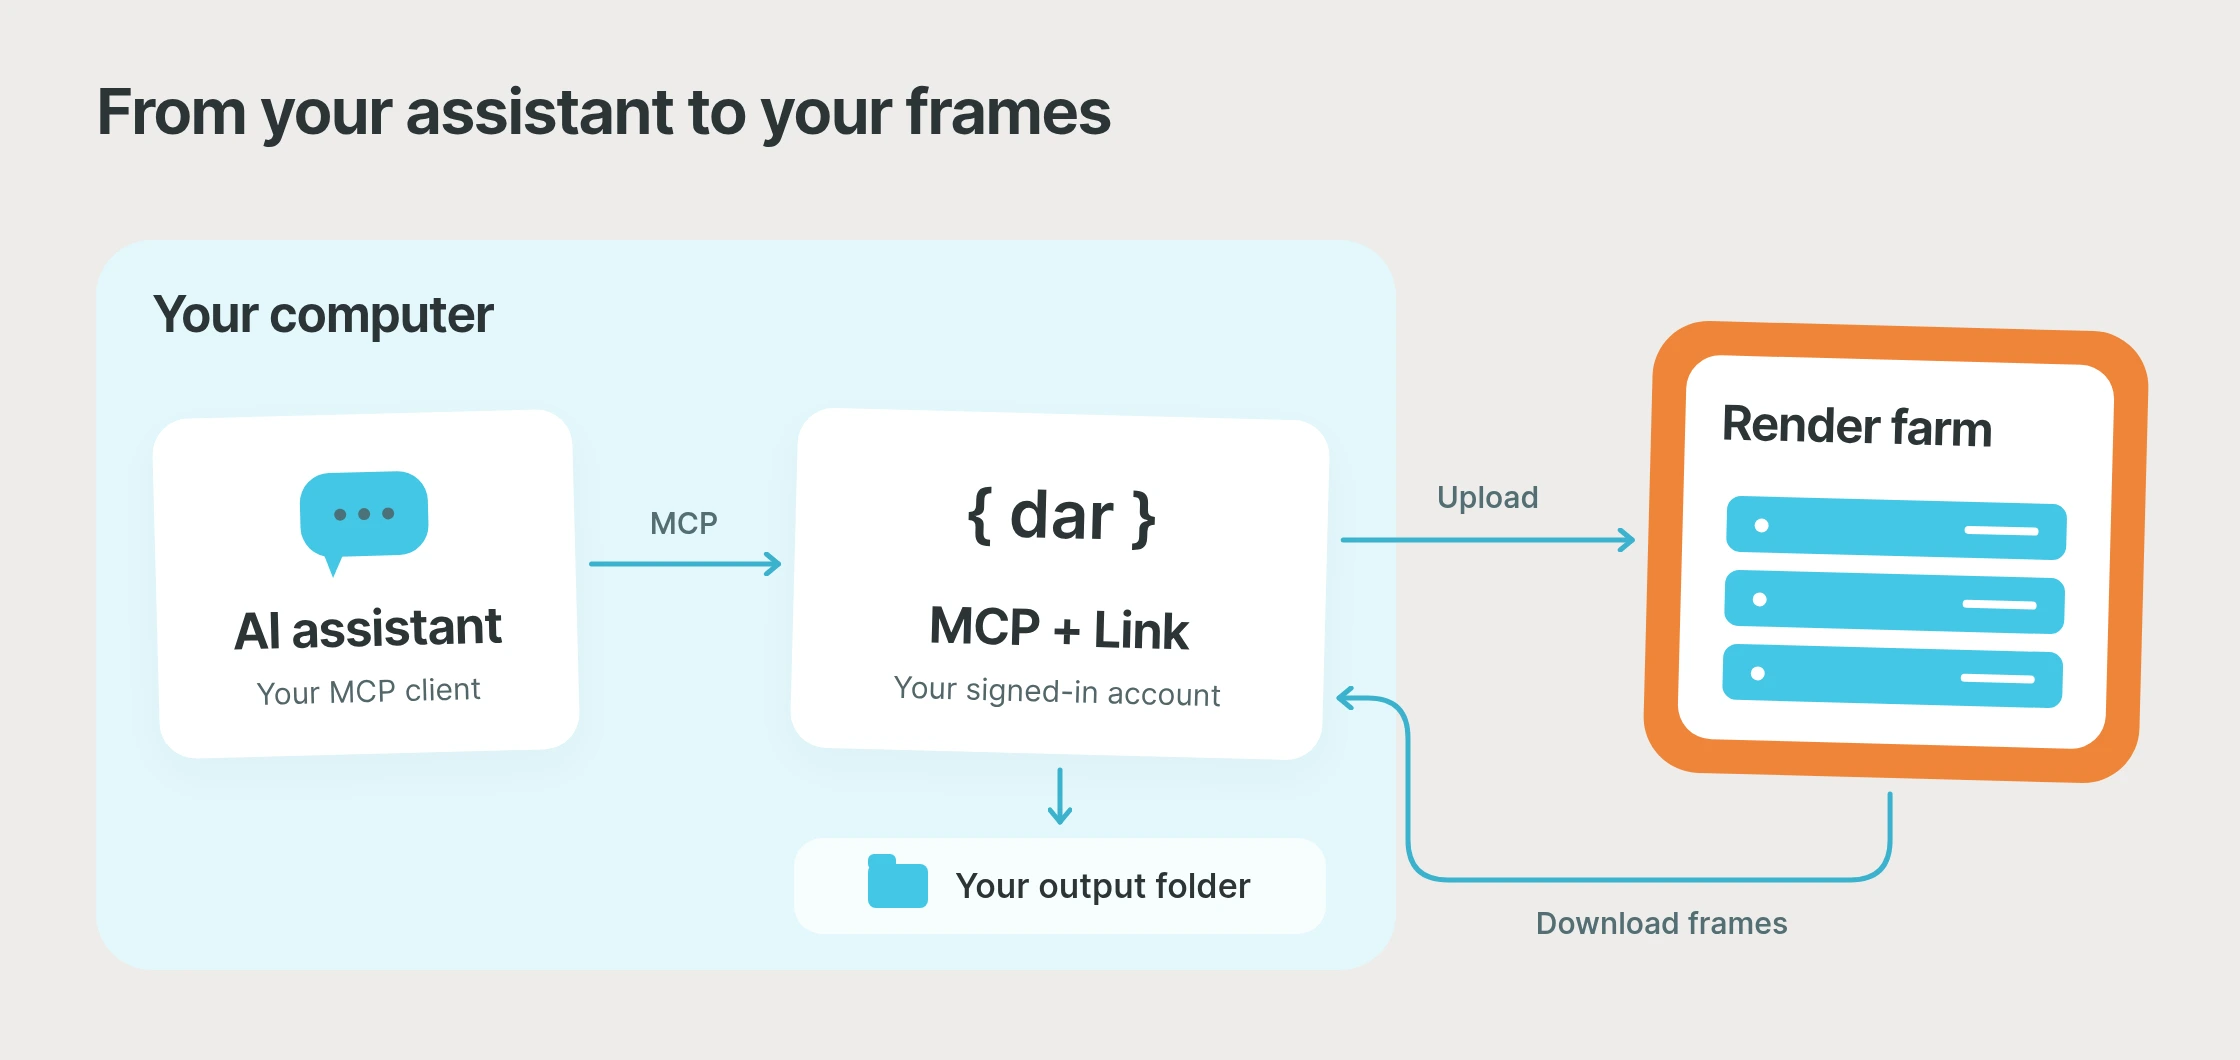
MCP, the Model Context Protocol, lets an assistant use tools outside the chat. Our extension exposes the dar command through MCP, so your assistant can work with real job data and render requests instead of asking you to copy terminal output. You can give it access to these render tools without granting it shell access.
Prepare a shot together
Ask your assistant to check available application versions and validate your render request before you submit it.
Ask about your renders
Find a shot by name or label and check its rendering and download progress separately.
Look into a failed slice
Have your assistant read job and slice details, explain what needs attention and propose a retry for you to approve.
Organize a batch
Prepare requests for a sequence of shots and use project and shot labels to keep the resulting jobs together.
Find earlier renders
Browse archived jobs and their files, then choose an output path to download the result you need.
Manage jobs from any submission
Follow and control jobs submitted through the Cinema 4D, Blender and Houdini plugins as well as the API.
Connect it to your assistant
Use an MCP client that supports Streamable HTTP on the same computer as Link. Your account stays connected through Link; there is no separate MCP API key.
-
1
1. Install Link and sign in
Create a Drop & Render account, download Link and sign in on the computer you use for your renders. New accounts get €25 in free render credits.
-
2
2. Install the MCP extension
Open Extensions in your dashboard and choose Install on MCP. You can also run
dar install ext-mcpin a terminal. -
3
3. Add the local server to your client
In your assistant’s MCP settings, choose Streamable HTTP and enter
http://127.0.0.1:3767/mcp. Leave authentication unset. Installation does not edit your client’s configuration. -
4
4. Start with a read-only check
Ask your assistant to read the dar tool’s help and check Link’s status. Set the client to ask for approval before submitting renders, changing jobs or uploading support reports.
| Connection setting | Value |
|---|---|
| Transport | Streamable HTTP |
| Server URL | http://127.0.0.1:3767/mcp |
| Authentication | None at the local endpoint; sign in through Link |
| Tool | dar |
The endpoint is local to your computer, not a public cloud connector. Only connect clients you trust: local processes can use the exposed commands through your signed-in account.
From a request to delivered frames
Ask an assistant with file access to prepare a render.json for your shot, including its application, version, render engine, scene, frame range, output folder and assets. The same request format is used by the render farm API.
Prepare frames 1 to 24 of shot010.blend with Cycles.
Include the textures folder and use renders/shot010
for the output. Validate the request first.
Show me the settings and ask before submitting.-
1
1. Prepare without spending credits
Use
job prepareto validate the request without creating a farm job. Review the scene, assets, frame range and output folder. Dependencies must be listed; they are not discovered automatically. -
2
2. Approve the render
Once you approve it in your client, the assistant can submit the request. Submission returns job IDs after acceptance; upload and rendering continue in the background. Keep source files unchanged until upload finishes.
-
3
3. Check delivery
Keep Link running. Your assistant can use
job statusto check render progress and download progress separately before handing the output to your next tool.
MCP calls run without a terminal confirmation. Your client owns approval for billable renders and job changes; closing the chat or cancelling a tool call does not stop accepted work. If a response is lost, inspect the job before trying the submission again.
The same API, one MCP tool
The dar tool takes an argument array without the executable name. It returns stdout, stderr and an exit code, preserving the CLI’s structured results and error guidance. Start with help that matches your installed version:
{"args": ["--help"]}
{"args": ["job", "prepare", "--help"]}
{"args": ["status"]}
For a request file, use an absolute path or supply an absolute working directory:
{
  "args": ["job", "prepare", "render.json"],
  "cwd": "/absolute/project"
}
Supported job, archive and sync commands are available, together with status, diagnostics, versions, plugin information and reports. Sign-in, installation and updates stay in Link or your terminal. The MCP tool does not run arbitrary shell commands.
No extra charge for the extension
MCP uses the same account, render credits and priority tiers as plugin and API jobs. Your AI client may charge separately; farm rendering follows our normal prices.
More ways to connect your pipeline
Render farm API
Submit, monitor and control Blender, Cinema 4D and Houdini renders from your own scripts and tools.
Deadline 10
Follow and control your Drop & Render cloud jobs in Deadline Monitor, next to your local renders.
Related FAQs
Questions about connecting your assistant, approving renders or following job progress?
What does the Drop & Render MCP extension do?
Why use MCP instead of the CLI?
Which MCP clients can connect?
Do I need an API key?
Does installation configure my assistant?
Will I be asked before a render spends credits?
Can I use it without writing a render request myself?
Does a submitted job keep running after the tool returns?
Is there an extra charge for MCP?


Supported software
Pipeline
Company details
Confirm