When several artists light a sequence in Solaris, their shots can share a set and material library while needing different render decisions. The wide shot may be ready for animation review, the close-up may need a material check, and a new camera angle may use a shorter frame range. Keeping those choices visible helps the lighting lead prepare a review without rebuilding each submission.
Our Houdini integration lets you submit multiple USD renders together, with a separate camera, frame range and output for each one. The team chooses the publishes to render, then records each shot's settings in render nodes that can be inspected together before submission.
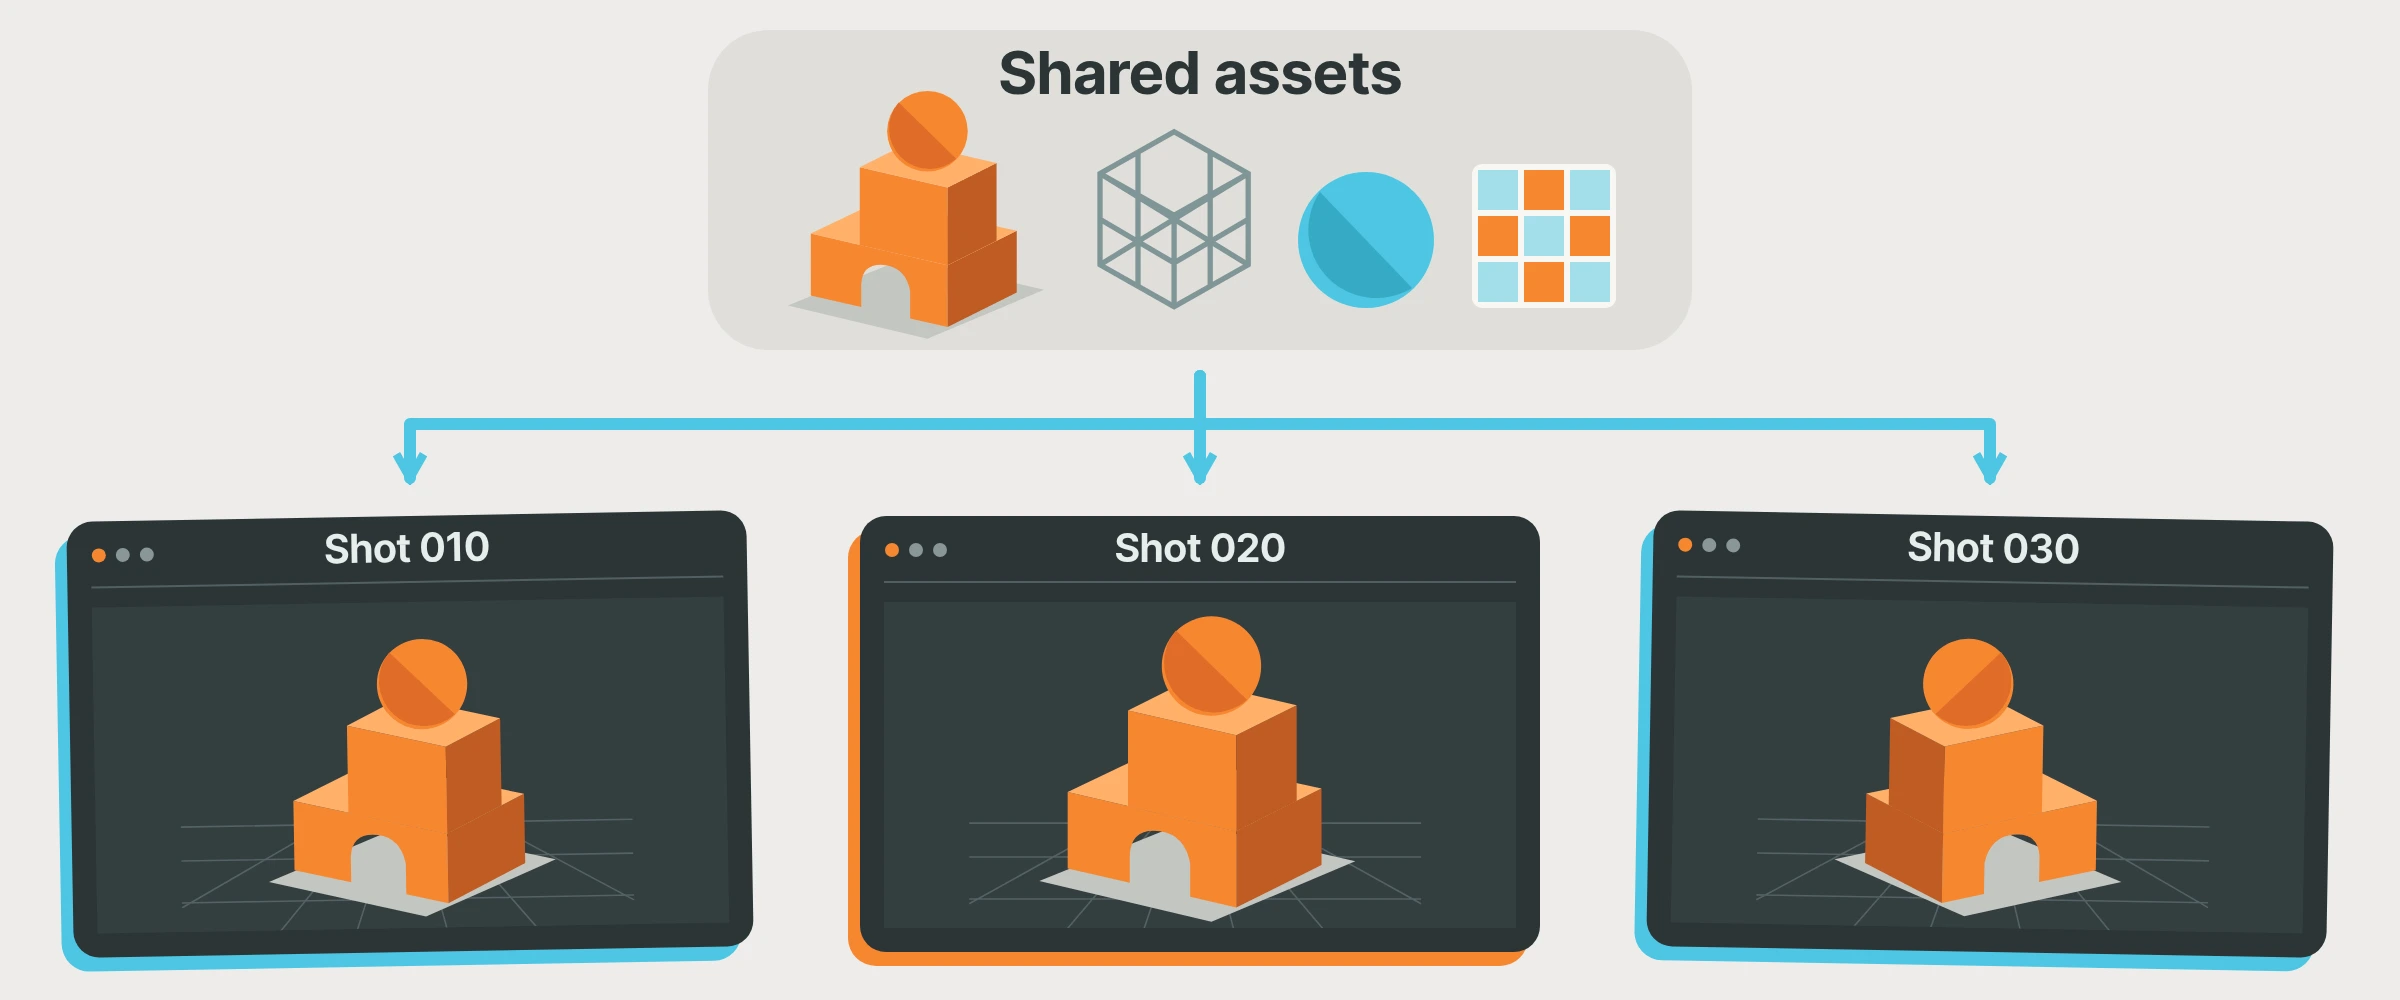 Several shots, one shared asset library. Each shot keeps its own camera and lighting.
Multiple shots, one submission
The DAR USD Render node lets you point directly at a published USD file and choose how to render it. Create a node for each shot you want to send, check its USD entry file, camera, render settings prim, frame range and output, then connect the nodes to the Drop & Render submission node. Each render keeps its own settings; independent jobs can run in parallel as machines become available.
You can also submit different views of the same shot. Send the main camera for animation review and a close-up for a material check, each writing to its own output folder. There is no need to rebuild the submission from scratch for every view.
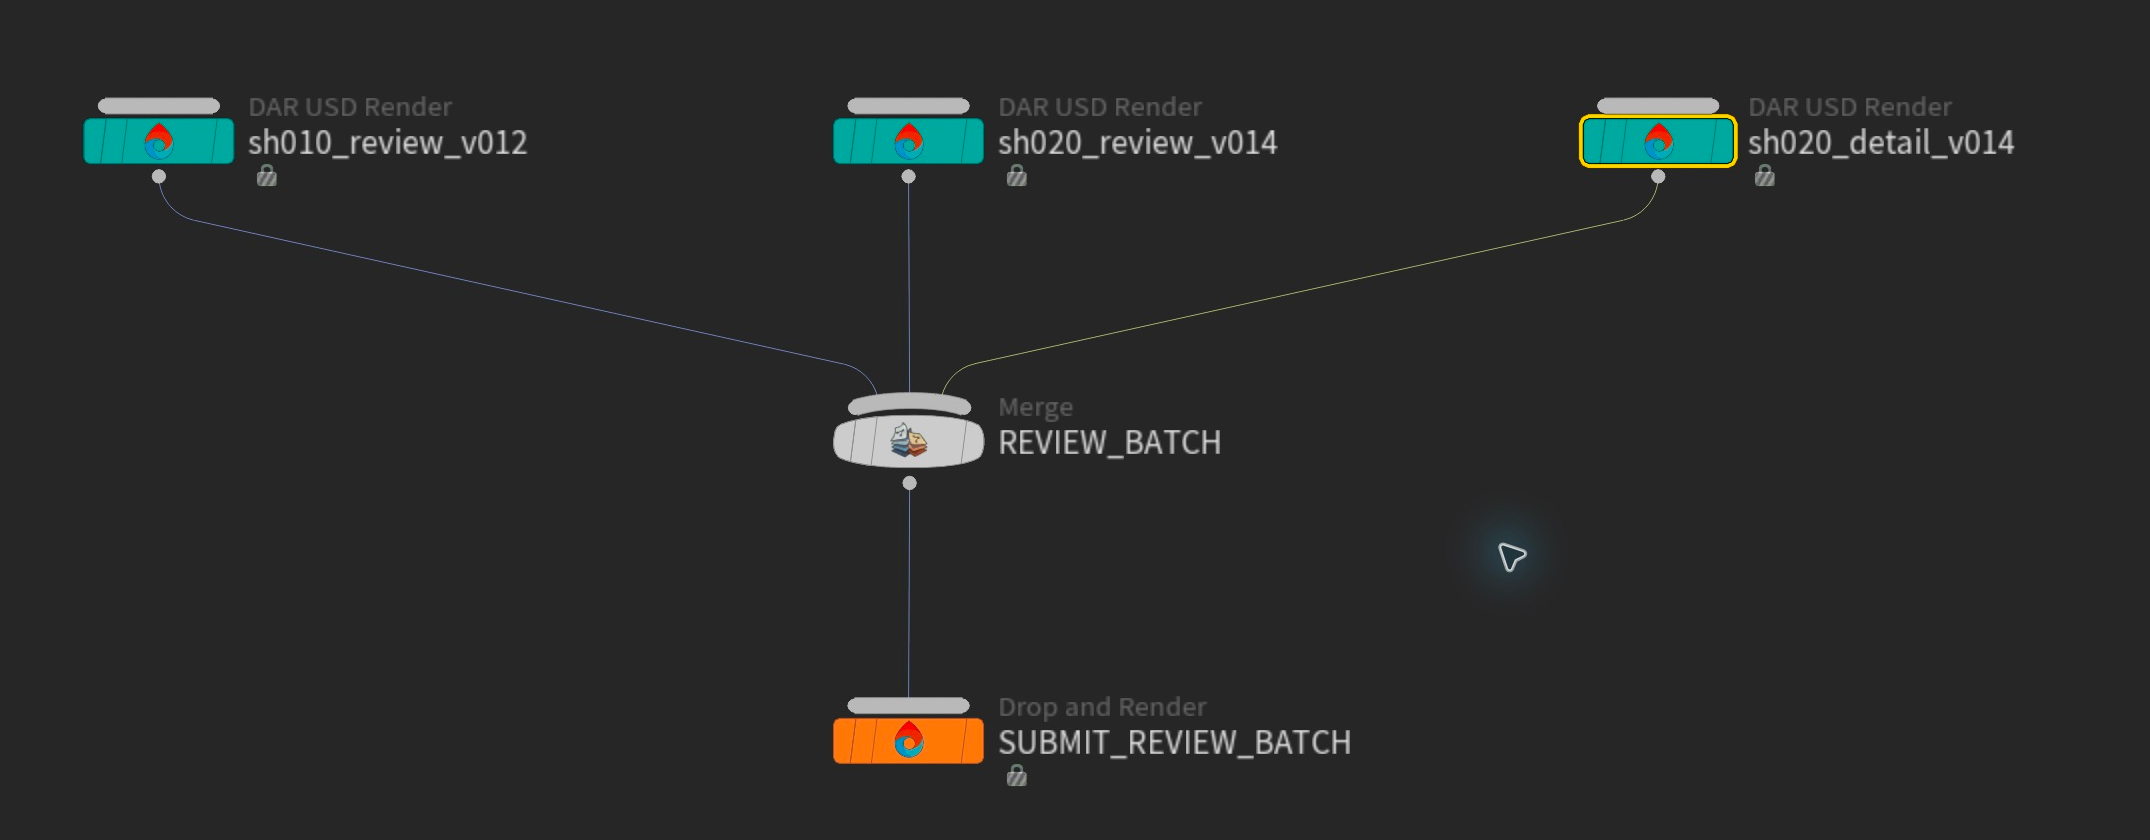 Submit several USD renders together while keeping their settings separate.
Give each render the settings it needs
A lighting preview rarely needs the same settings as a final delivery. You may want a lower resolution, fewer samples or just a handful of frames to judge a change.
The DAR USD Render node provides resolution and sample overrides, so you can make those choices without editing the source USD file. Keep a review node alongside your delivery node, with distinct names and output folders. For example, sh020_review_v014 and sh020_delivery_v014 describe their intended use more clearly than two identically named render nodes.
Check the selected publish as well as the render settings; a newer model or material version may be available without belonging in this review. The next artist should be able to see both what was rendered and why those settings were chosen.
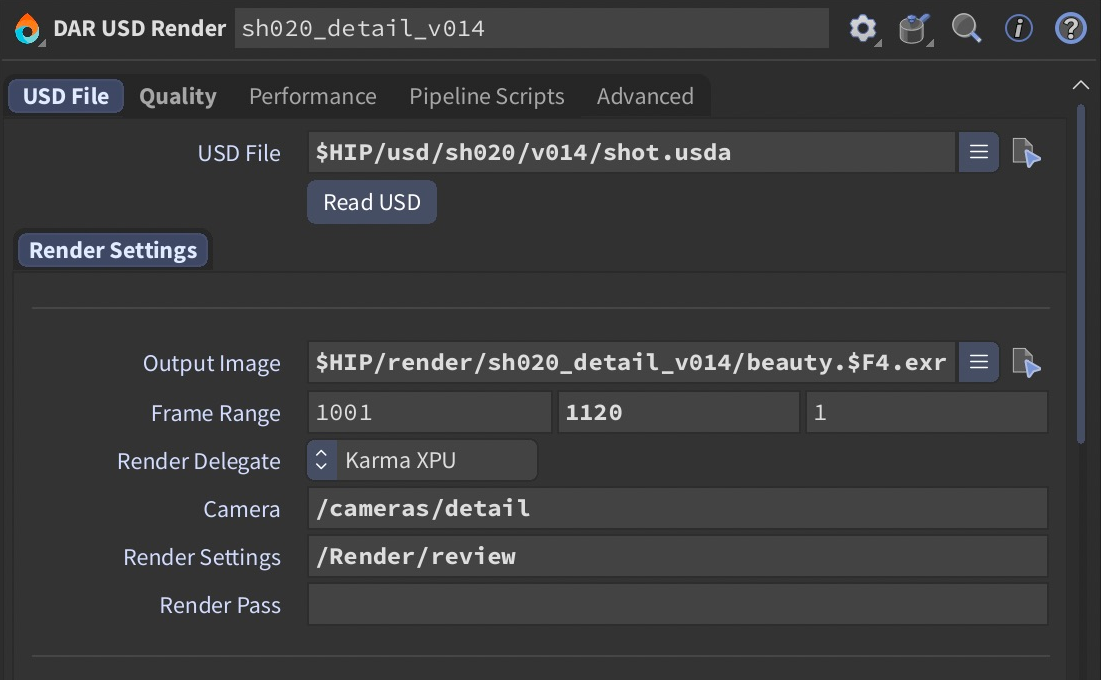 The shot's input, camera and output stay visible in Houdini.
The assets behind the shot come with it
A USD file can reference other USD layers, which reference textures and caches. Your opening shot and close-up might both depend on the same environment and material library.
We scan the composed USD stage to collect used layers and asset references, including textures, tiled texture sets and animation clips. The discovered files appear in the Assets view. Review them when a shot introduces a new library or publish location, and resolve reported missing files before sending the batch. If your pipeline uses a custom asset resolver, talk to us about its setup before submission.
Your team chooses which asset versions the shots reference; the scanner collects dependencies for those scenes. Our USD and asset synchronization article explains that system in more detail, including the files behind the entry USD.
Work from Houdini or from a published USD
Some studios finish the stage inside Solaris and submit the Houdini scene. Others publish a USD file and render that directly. We support both approaches, plus a workflow that converts to USD on the farm before rendering with Husk, Houdini's command-line USD renderer.
With conversion first, we create the export job and the render job together, and rendering waits for the export job to finish. Our guide to the three USD workflows explains the setup; choose the handoff that fits how your team publishes work from lighting.
When the client changes one shot
If the wide shot is approved while the close-up needs warmer lighting, update the close-up's selected publish and give its output a new version. Submit the relevant render nodes and leave the approved shot alone. Check any shared-layer edits carefully; changing a layer used by several shots can affect more than the shot you intended to revise.
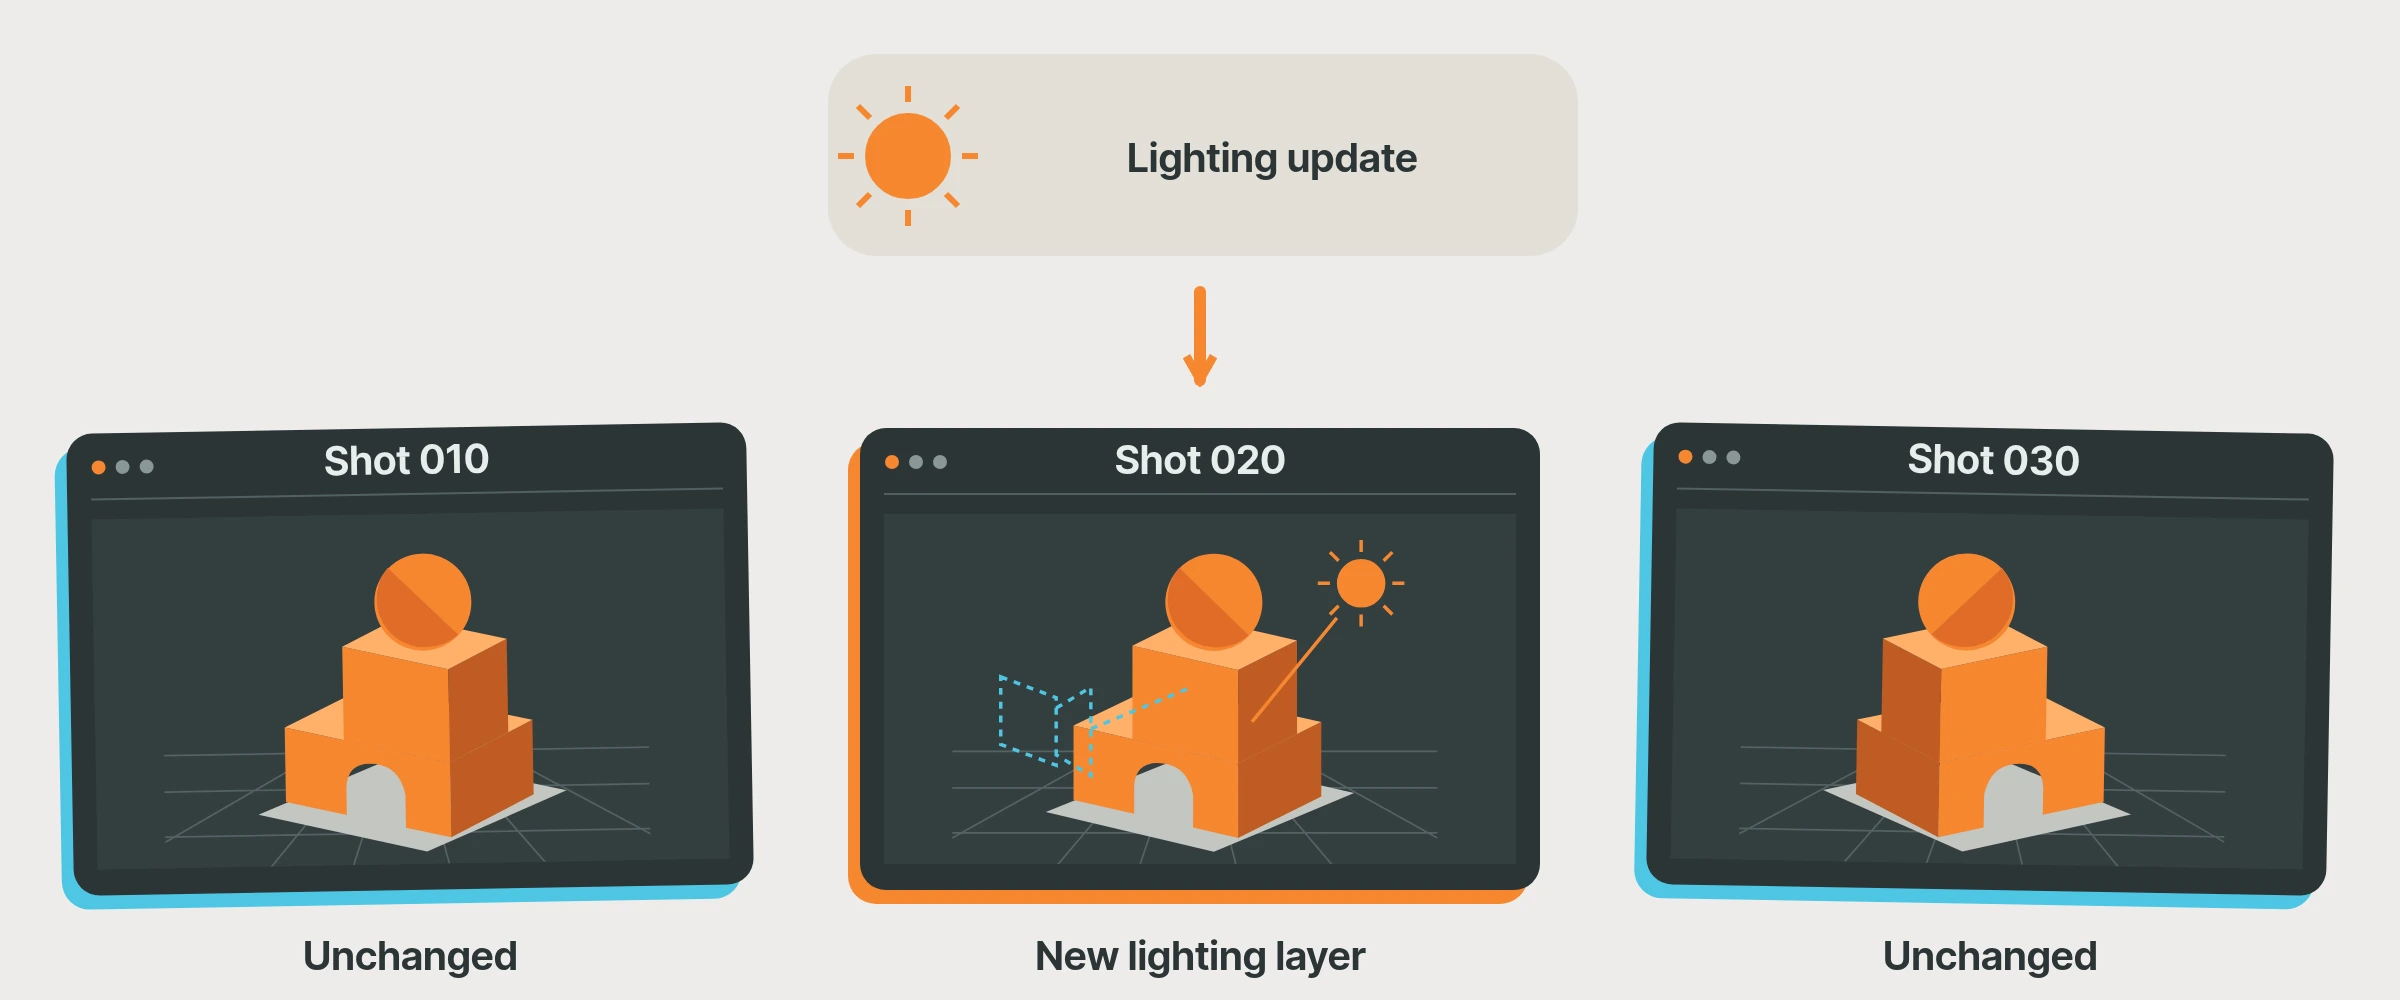 Update the lighting for one shot while the other shots keep their existing layers.
For a first batch through the Houdini render farm integration, use two shots that share assets but have different cameras or review settings. Check their publishes, dependencies and output paths together, then inspect the returned images. That gives the lighting team a concrete submission example without assuming every shot needs the same settings.